· Adam Ferguson · 12 min read
Creating and publishing a .NET NuGet package
Learn how to build a .NET library, pack for distribution, and seamlessly publish to your choice of public or private NuGet feeds. Learn how to leverage the power of GitHub Actions and Git tags to automate your workflow, ensuring efficient and reliable deployment of your .NET packages

What are .NET Libraries and NuGet Packages?
.NET libraries are reusable collections of code that provide specific functionality to developers. These libraries can be compiled into assemblies (DLLs) and distributed for use in other .NET projects. NuGet packages, on the other hand, are a standardized way of packaging and distributing these libraries. A NuGet package typically contains one or more DLLs along with additional metadata and dependencies.
NuGet serves as the package manager for the .NET ecosystem, allowing developers to easily discover, install, and update libraries in their projects. This system greatly simplifies dependency management and promotes code reuse across the .NET community.
An example of a NuGet package is Hooki
Why are .NET Libraries and NuGet Packages Useful?
.NET libraries and NuGet packages play a crucial role in modern .NET development for several reasons:
Code Reusability: Developers can package common functionality into libraries, reducing duplication and promoting consistent implementations across projects.
Open Source Contributions: The .NET community thrives on open-source libraries that provide solutions for common problems, from logging frameworks to ORM tools.
Microservices Architecture: In a microservices architecture, shared libraries can be used to define common contracts, ensuring consistency in communication between services. An example is using a shared library for event driven message contracts with technologies like RabbitMQ.
SDK Development: Companies often create SDK libraries to provide easy integration with their APIs or services, simplifying the development process for their customers.
Versioning and Updates: NuGet’s versioning system allows developers to easily manage and update dependencies, ensuring their projects always use the latest features and security patches.
Cross-Platform Development: Libraries targeting .NET Standard can be used across different .NET implementations, facilitating cross-platform development.
By leveraging .NET libraries and NuGet packages, developers can focus on building unique features for their applications while standing on the shoulders of the broader .NET community’s collective work.
What do I mean by packing and publishing?
Packing and publishing a NuGet package is a crucial process in the .NET ecosystem that enables code sharing and reuse. Here’s what it entails:
Packing: This step involves bundling your .NET library code into a standardized format. The packing process compiles your code, gathers necessary files, and creates a
.nupkgfile containing your library and its metadata.Publishing: Once packed, the package is uploaded to a NuGet feed, making it available for other developers to discover and use.
Public vs. Private Packages
Public Packages: These are typically published to the official NuGet.org gallery, making your library freely available to the global .NET community.
Private Packages: Published to controlled, often organization-specific feeds, such as Azure Artifacts or internal NuGet servers. This approach allows companies to share proprietary code internally or with select partners without exposing it publicly.
Let’s see some code!
Note: I will be using Alertu.Library as the name of the project and github repository. You can choose any name you like.
Note: We will be working with the main branch for simplicity.
Prerequisites
- Github account
- Git installed on your machine
- VS Code
- Visual Studio or Rider
- .NET SDK if not already installed
- NuGet.org account
Step 1: Setting up your project and GitHub repository
Create a new directory for your project and initialize a Git repository:
Terminal window mkdir Alertu.Librarycd Alertu.Librarygit initdotnet new gitignoreecho "# Alertu.Library" > README.mdCreate the initial file structure:
Alertu.Library/├── src/└── .github/└── workflows/└── build-pack-and-publish.ymlYou can create this structure using the following commands:
Terminal window mkdir -p src .github/workflowstouch .github/workflows/build-pack-and-publish.yml- The
srcdirectory will contain all of the source code for your .NET library - The
.github/workflowsdirectory with thepack-and-publish.ymlfile is for storing your Github Actions workflow to pack and publish your .NET library as a nuget package.
- The
Create your .NET library: Navigate to the
srcdirectory in your terminal and run the following command:Terminal window dotnet new classlib -n Alertu.LibraryThis command will create a new class library project in your current directory.
-nor--nameargument enables you to provide a name for your library.-for--frameworkargument allows you to provide a target framework for your library. If not provided, the library will be created with the latest LTS version of .NET for the SDK you’re using.-oor--outputargument specifies the directory where the library will be created. If not provided, the library will be created in the current directory.
Initialize the GitHub repository:
- Go to GitHub and sign in to your account.
- Click on the ’+’ icon in the top right corner and select ‘New repository’.
- Name your repository (e.g., “Alertu.Library”).
- Choose whether to make it public or private.
- Do not initialize the repository with a README or a .gitignore.
- Choose a license if you’re intending to make your Github repository public.
- Click ‘Create repository’.
Link your local repository to GitHub: GitHub will provide instructions, but they will look similar to this:
Terminal window git remote add origin https://github.com/yourusername/Alertu.Library.gitgit branch -M maingit push -u origin mainMake your first commit and push:
Terminal window git add .git commit -m "Initial commit: Set up project structure and .NET library"git push
Your project is now set up locally and on GitHub, ready for further development and eventual publishing as a NuGet package.
Step 2: Configruing your .NET library for packing
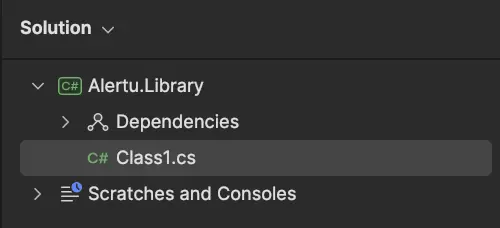
Open the class library you just created using your IDE. Your project should look like this:

Delete the class called Class1.cs.
Open your Alertu.Library.csproj file.
Your csproj file should look similar to this:
<Project Sdk="Microsoft.NET.Sdk"> <PropertyGroup> <TargetFramework>net8.0</TargetFramework> <ImplicitUsings>enable</ImplicitUsings> <Nullable>enable</Nullable> </PropertyGroup></Project>Note: This configuration will vary depending on your .NET version.
Let’s add some configuration to our .csproj file to make it ready for packing.
Note: Replace these properties with your own values!
<Project Sdk="Microsoft.NET.Sdk">    <PropertyGroup>        <TargetFramework>net8.0</TargetFramework>        <ImplicitUsings>enable</ImplicitUsings>        <LangVersion>latest</LangVersion>        <Nullable>enable</Nullable>        <PackageId>Hooki</PackageId>        <Authors>Adam Ferguson</Authors>        <Company>Alertu</Company>        <Description>Hooki is a powerful .NET library designed to simplify the creation of webhook payloads for popular platforms like Discord, Slack, and Microsoft Teams. It provides a set of strongly-typed C# POCO classes that serve as building blocks, allowing developers to easily construct and serialize webhook payloads into JSON format</Description>        <PackageLicenseExpression>MIT</PackageLicenseExpression>        <PackageProjectUrl>https://github.com/AlertuLabs/Hooki</PackageProjectUrl>        <RepositoryUrl>https://github.com/AlertuLabs/Hooki.git</RepositoryUrl>        <RepositoryType>git</RepositoryType>        <PackageTags>webhooks, microsoftTeams, slack, discord, json, payload</PackageTags>        <PackageReadmeFile>nuget.readme.md</PackageReadmeFile>        <PackageIcon>hooki-icon.png</PackageIcon>    </PropertyGroup>
    <ItemGroup>        <None Include="..\..\nuget.readme.md" Pack="true" PackagePath="\"/>        <None Include="..\..\assets\hooki-icon.png" Pack="true" PackagePath="\"/>    </ItemGroup></Project>
Key Properties in .csproj for NuGet Packages
TargetFramework: Specifies the .NET version your library targets (e.g.,net8.0).ImplicitUsings: Enables implicitusingstatements when set toenable.LangVersion: Sets the C# language version,latestuses the most recent features.Nullable: Enables nullable reference types when set toenable.PackageId: The unique identifier for your NuGet package.Authors: Names of the package authors.Company: Name of the company producing the package.Description: A concise summary of what your package does.PackageLicenseExpression: Specifies the license (e.g.,MIT) using SPDX identifier.PackageProjectUrl: URL to the project’s homepage.RepositoryUrl: URL to the source code repository.RepositoryType: Type of repository (e.g.,git).PackageTags: Comma-separated list of tags to help in package searches.PackageReadmeFile: Filename of the README specifically for NuGet.org.PackageIcon: Filename of the icon to be displayed on NuGet.org.
Separate README Files
It’s a best practice to maintain two separate README files:
README.md: GitHub-flavored markdown file for your GitHub repository.nuget.readme.md: A markdown file without HTML specifically for NuGet.org.
This approach ensures that your NuGet package README is correctly formatted and professional, while allowing for a more comprehensive README on GitHub. The nuget.readme.md file is referenced in the PackageReadmeFile property and included in the package using:
<ItemGroup> <None Include="..\..\nuget.readme.md" Pack="true" PackagePath="\"/></ItemGroup>For the purpose of this blog post, I will be creating a test class called HelloWorld.cs and adding it to the project so we have something to pack and publish.
namespace Alertu.Library;
public class HelloWorld{    public string GetGreeting(string name)    {        return $"Hello, {name}! Welcome to Alertu.Library.";    }
    public static string GetStaticGreeting()    {        return "Hello, World! This is a static greeting from Alertu.Library.";    }}
Packing and Publishing your .NET library with Github Actions
Now that we have setup our .NET library, we can pack and publish it to NuGet.
The GitHub Actions workflow we’re about to create automates the process of building your .NET project, creating a NuGet package, and publishing it to NuGet.org when you create a new tag. It ensures that your code is built and tested (will talk more on this later) on pull requests and merges into main, but only publishes when you explicitly create a new version tag on the main branch.
By implementing this workflow, you can streamline your development process, ensure consistent builds, and simplify your release management. Happy coding!
Step 1: Implement the Github Actions workflow
Navigate to your pack-and-publish.yml file in your .github/workflows directory and replace the contents with the following:
name: build-pack-and-publish
on:  push:    branches: ["main"]    tags: ["v*.*.*"]  pull_request:    branches: ["main"]
jobs:  build:    runs-on: ubuntu-latest    steps:      - uses: actions/checkout@v4      - name: Setup .NET        uses: actions/setup-dotnet@v4        with:          dotnet-version: 8.0.x
      - name: Restore dependencies        run: dotnet restore src/Alertu.Library
      - name: Build        run: dotnet build src/Alertu.Library --configuration Release --no-restore
      - name: Upload build artifacts        uses: actions/upload-artifact@v3        with:          name: build-output          path: src/Alertu.Library/bin/Release
  pack-and-publish:    needs: build    if: github.event_name == 'push' && startsWith(github.ref, 'refs/tags/v')    runs-on: ubuntu-latest    steps:      - uses: actions/checkout@v4      - name: Setup .NET        uses: actions/setup-dotnet@v4        with:          dotnet-version: 8.0.x
      - name: Download build artifacts        uses: actions/download-artifact@v3        with:          name: build-output          path: src/Alertu.Library/bin/Release
      - name: Set version and trim leading 'v'        run: |          version=$(echo ${{ github.ref_name }} | sed 's/^v//')          echo "VERSION=$version" >> $GITHUB_ENV          echo "Set VERSION to $version"
      - name: Pack        run: dotnet pack src/Alertu.Library/Alertu.Library.csproj --configuration Release --no-build -p:PackageVersion=${{env.VERSION}} --output ./nupkgs
      - name: Publish to NuGet        run: dotnet nuget push "./nupkgs/Alertu.Library.*" --source https://api.nuget.org/v3/index.json --api-key ${{secrets.NUGET_API_KEY}} --skip-duplicate
Workflow Overview
Our workflow, defined in .github/workflows/build-pack-and-publish.yml, consists of two main jobs: build and pack-and-publish.
Workflow Triggers
on: push: branches: ["main"] tags: ["v*.*.*"] pull_request: branches: ["main"]This workflow runs when:
- A pull request is opened or updated for the
mainbranch. - Code is pushed to the
mainbranch. - A new version tag is created (e.g.,
v1.0.0).
The Build Job
Note: Build job will always run for pull requests, pushes into main branch and on the creation of Git tags.
The build job runs on the latest Ubuntu environment and performs several crucial steps.
- Checkout the code
This step checks out the code from your Github repository.
- uses: actions/checkout@v4- Setup .NET
Note: If you’re not using .NET 8, make sure to update with the version you’re using.
- name: Setup .NET uses: actions/setup-dotnet@v4 with: dotnet-version: 8.0.x- Restore dependencies
This step restores the project’s dependencies using the dotnet restore command.
- name: Restore dependencies run: dotnet restore src/Alertu.Library- Build the project
- name: Build run: dotnet build src/Alertu.Library --configuration Release --no-restore- Upload build artifacts
This step uploads the build artifacts to the GitHub Actions runner, allowing us to download them later in the pack-and-publish job speeding up the process.
- name: Upload build artifacts uses: actions/upload-artifact@v3 with: name: build-output path: src/Alertu.Library/bin/ReleaseThe Pack and Publish Job
Notice the if condition, this job only runs when a new Git tag is created, ensuring we publish when we’re ready for a new release.
pack-and-publish: needs: build if: github.event_name == 'push' && startsWith(github.ref, 'refs/tags/v') runs-on: ubuntu-latest- Download build artifacts
This step downloads the build artifacts from the build job.
- name: Download build artifacts uses: actions/download-artifact@v3 with: name: build-output path: src/Alertu.Library/bin/Release- Set version number
This step creates an environment variable VERSION based on the Git tag and trims the leading v from the tag name. Nuget only supports numbers and . for the version number.
- name: Set version and trim leading 'v' run: | version=$(echo ${{ github.ref_name }} | sed 's/^v//') echo "VERSION=$version" >> $GITHUB_ENV echo "Set VERSION to $version"- Pack the NuGet package
This step packs the NuGet package using the dotnet pack command providing the env.VERSION as the package version.
- name: Pack run: dotnet pack src/Alertu.Library/Alertu.Library.csproj --configuration Release --no-build -p:PackageVersion=${{env.VERSION}} --output ./nupkgs- Publish to NuGet
Finally, we push the NuGet package using dotnet nuget push command, specifying the source, NuGet API key and skipping duplicate packages.
Note: If you’re using a private NuGet feed, replace https://api.nuget.org/v3/index.json with your private feed URL.
Follow this guide to create a NuGet API key
Follow this guide to add your NuGet API key to your repository’s Github Actions secrets
Note: Make sure to add the NuGet API key as a secret in your repository otherwise you will fail to authenticate when publishing to NuGet.
Note: Do not copy and paste your NuGet API key directly into your build-pack-and-publish.yml file. This is a security risk! If your Github repository is public anyone will be able to see your NuGet API key and use it publish to your NuGet feed.
- name: Publish to NuGet run: dotnet nuget push "./nupkgs/Alertu.Library.*" --source https://api.nuget.org/v3/index.json --api-key ${{secrets.NUGET_API_KEY}} --skip-duplicateFinal Steps
Commit and push your changes
We’re nearly done! Now it’s time to commit and push your changes to your repository. You can do this by running the following commands:
git add .git commit -m "Implemented Github Actions workflow for .NET projects"git pushNavigate to your Github repository
Navigate to your Github repository actions https://github.com/your-repo-name/actions and if everything is working you should see your workflow running or finished.
Notice how the workflow only built your application and didn’t pack or publish
Create a Git tag
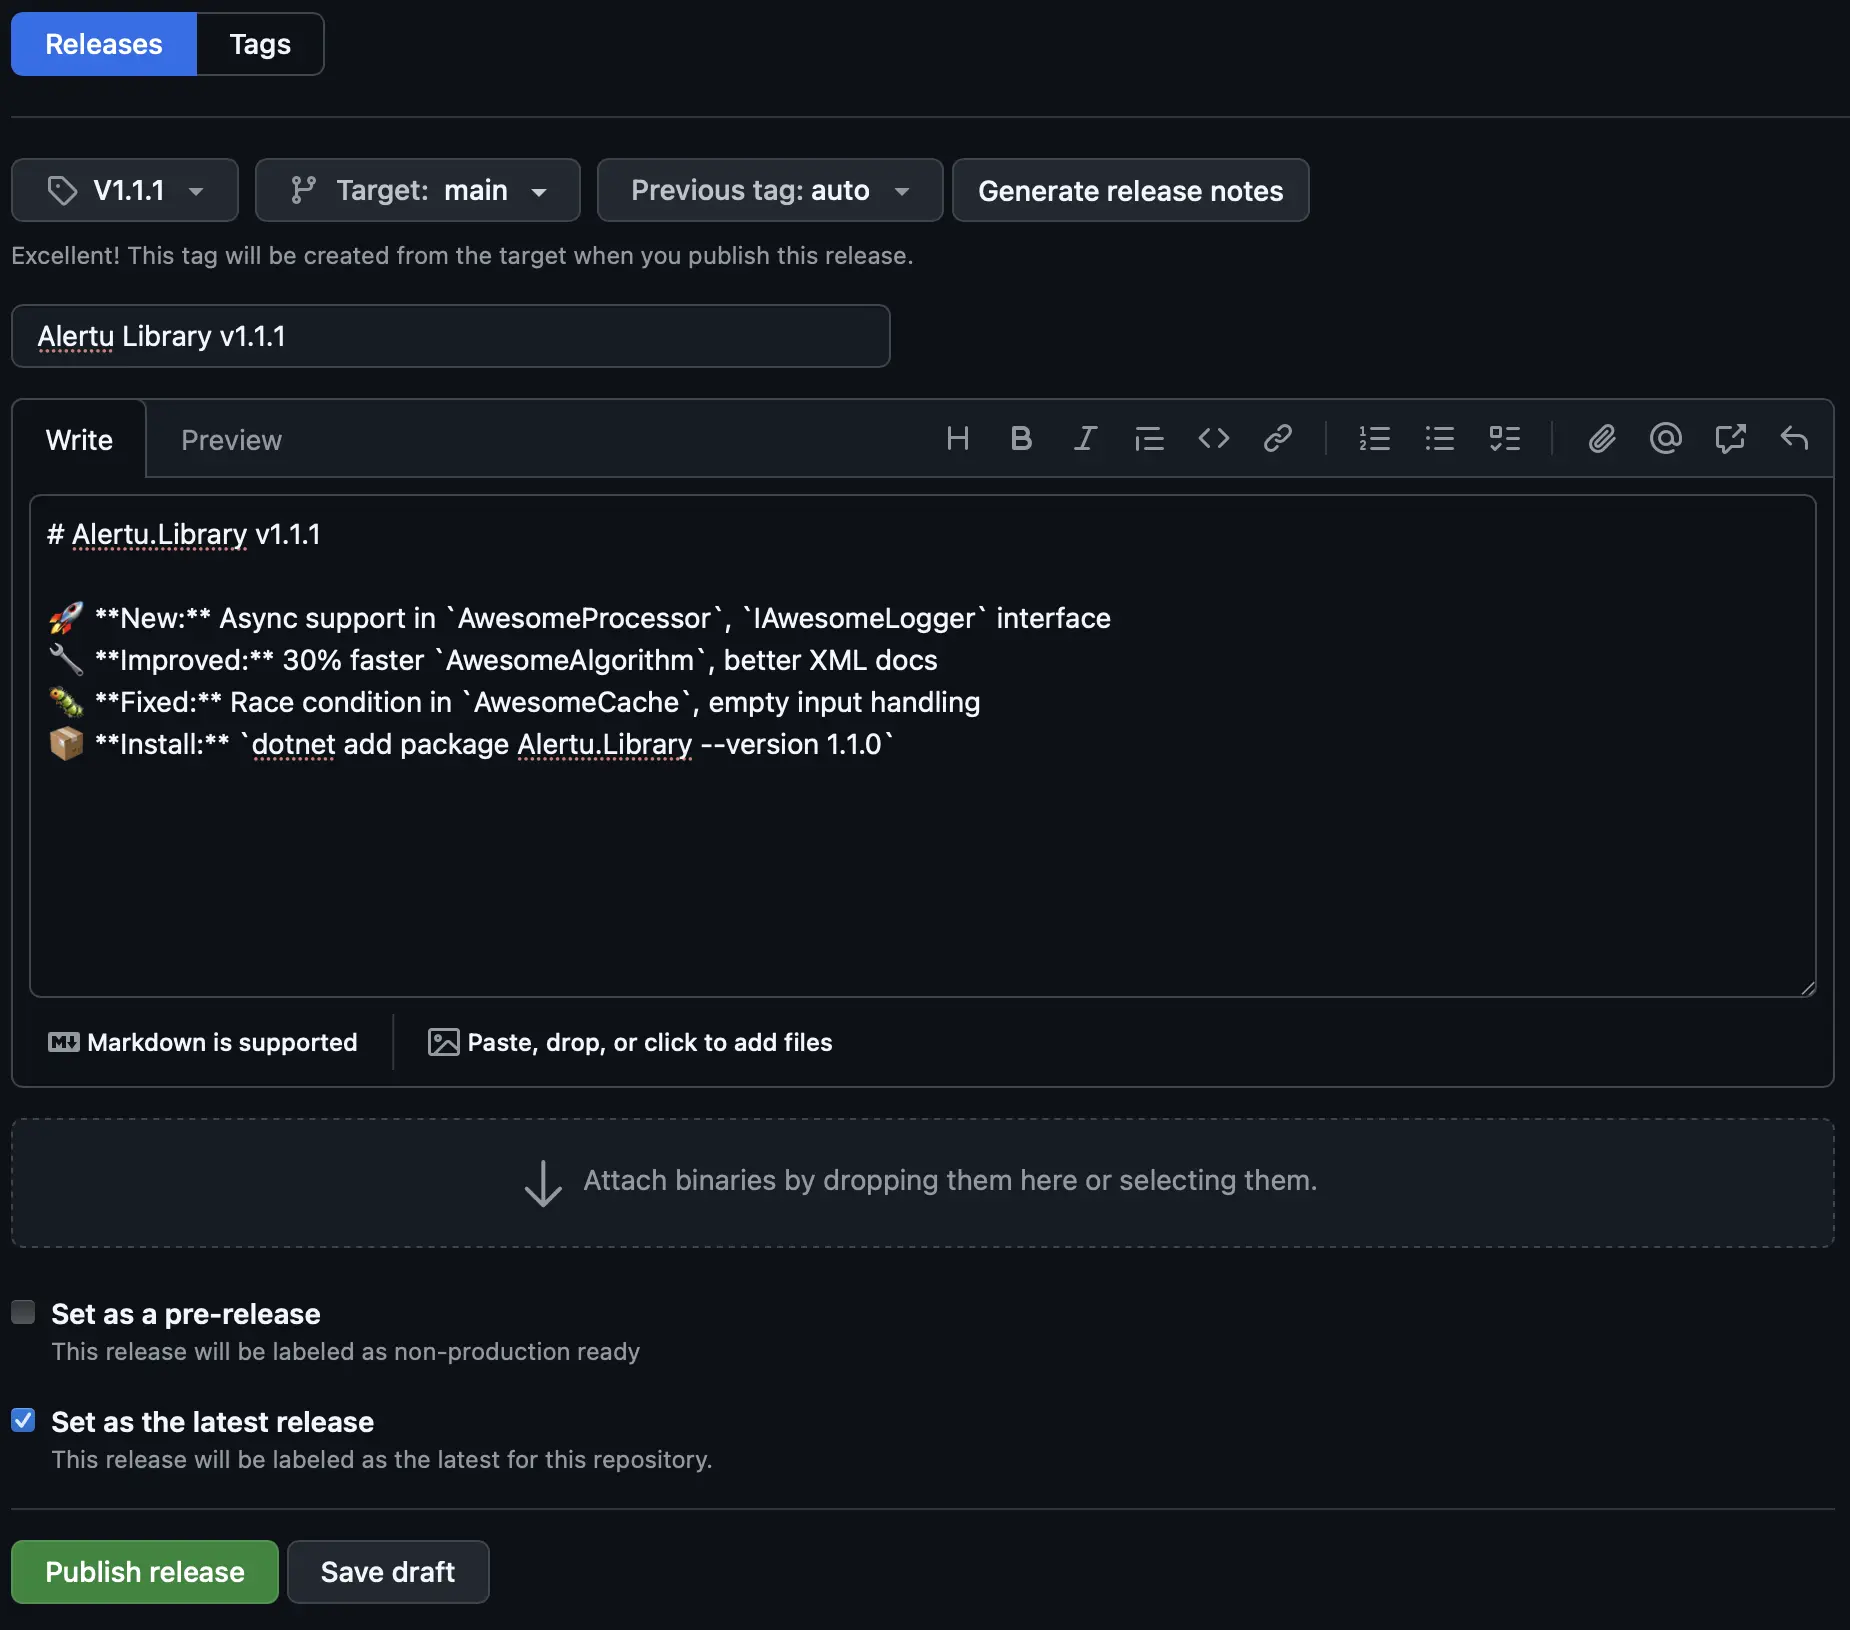
Navigate to your Github repository releases https://github.com/your-repo-name/releases and create a new release.
- Click on
Choose a tagand enter this version numberv1.0.0 - Set the target branch to
main - Provide a suitable release title and description
- Optionally set the release as a
pre-release. If you do this, make sure to include a suffix in your version number likev1.0.0-beta - Click
Publish release

Congratulations! You should now see your workflow running to build, pack and publish your .NET library as a NuGet package to NuGet.org.
Head back over to NuGet.org, sign in and click on your profile and then click on Manage Packages. It might take a couple of minutes for your package to appear.
How to implement testing in your .NET library and Github Actions
Take a look at this complete example
- Navigate to the
srcdirectory and you can see that I have created twoXUnitprojects. - Navigate to the Github Actions workflow file
.github/workflows/pack-and-publish.ymlto see the small changes required to integrate testing.

